PERTRONIX SYSTEM IN A 1967 ROVER P5 MK 3 by Ben Rodgers
 The actual installation was so simple, it took little more than twenty minutes to complete the fitting. So when Eric asked me to write up an article on it, I thought right! that should take at lease two lines. I gave it some more thought and decided (at the risk of boring everyone) to tell you how I came to fork out for the Pertronix unit.
I purchased my P5 Rover three years ago in Yarmouth, NS, the car was a one owner, and had been picked up by a local dealer when the original owner died. Then it changed dealer hands a couple of times, probably because no one could start the car ,or sell it. Enter YOURS TRULY: one walk around the car in pouring rain and I made my decision to buy it. It still wouldn't start, I noticed a new coil, new points and condenser had been installed recently. Obviously someone had been trying hard to get it running. I had the car trailered home to PEI, and as it was already November, put right into the garage. Over the next few months I went over the car carefully, replacing the things needed. I bought a new dist. cap from Ruth, installed new wires and plugs. I removed the carb, which was very dirty, and sent it to Hughes Carbs in Ontario for a rebuild. When the last snows melted, I was ready to launch my new toy onto the roads of PEI. It did start now, but was still very hard to get running first time each day. Once it was warmed up it, would start reasonably well. Nevertheless , I didn't feel completely confident taking it out, always worrying it might let me down away from home, and it did.
The rebuilt carb tended to flood, I found the float was leaking and half full of gas! replaced it, saying to myself, that must have been the problem all along! Still the car remained hard to start and somewhat unreliable. I played with the carb adjusting and re-adjusting! I played with the timing setting and re-setting. Nothing seemed to help, but I was convinced it was gas causing my difficulties. Winter came around again, the car went back inside. Still sure I had a fuel problem, I began at the gas tank. I found the twin Lucas pumps disconnected, an after market wired in place. Getting the Lucas pumps working was just a matter of cleaning the points, the after market pump was duly discarded. I checked compressions, all were good. Naturally I was doing alot of other work through the winter months beside the starting problem. Radiator was out and cleaned ,,all new hoses fitted,, rebuilt the brake master cylinder and installed a new servo unit. Soon it was summer again and once more my beautiful Rover was standing in the driveway. Yes, it was still a bear to start. I went over the three items needed to make a gasoline engine run, : fire, fuel, and air.
Well it wasn't fire, I had convinced myself of that!! Linda (my wife, a handy mechanic herself) didn't agree, but I'm Irish and stubborn! Must be air, a long search for leaks followed, none were found. The PCV wasn't great and could have been leaking slightly so it was replaced. Only a slight improvement was maybe noticed, I think I was just trying to make myself believe it was better.
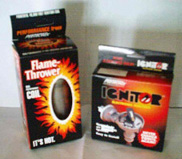
Finally, I decided to have a look at the ignition system, of course I knew it wasn't this! I checked the spark at the plugs, I had spark , but pretty weak at best. I removed the HT wire from the coil, (that's the new coil) and found the inside connection very corroded. I can't understand how this came about, everything was well sealed, could the coil be bad.?? Going to the barn, I dug out an old Lucas HA 12 coil as listed for this model. Fitted it, and believe it or not, had an instant improvement in starting. As the new coil was after market, I assumed the points & condenser were too. At about this time, Eric's article on installing Pertonix in his TC , appeared in the newsletter. I emailed Eric, and with his help ordered the system needed for my car. It arrived promptly a few days later at a total cost of $160. I purchased both the system for the distributor and matching coil. Installing the coil was just a matter of loosening the clamp and slipping it into place. Next I removed the old points and condenser. The electronic pieces are easy to install and fit exactly in place of the original points. Complete instructions come with the system. I fastened the ignitor plate into position with the two screws provided, placed the module over the studs and tightened with nuts provided. Installing the magnetic sleeve was probably the most difficult part, but even this wasn't hard, just required a bit of care in fitting it correctly over the distributor cam, making sure it was in place. I pressed the wire grommet into the slot on the dist. body , making sure the wires were clear of the vacuum advance mechanism, replaced rotor and cap. I lead the two wires (red and black) to the coil, red goes to positive and black to negative side of the coil.
The job was done, and my car now works great, starts immediately, runs smoothly and certainly feels like it has more power. So anyone out there experiencing similar problems, don't do as I did and take three years to finally decide to buy Pertronix, do it now, and save all the heartache!!! <grin>, Linda just gave me that, I told you so look!!!
Submitted by F.Ben Rodgers, Member from the East Coast!!